Everything SIG issues to an operator. Cards are drafted mid-run; ultimates, drones and consumables are equipped before you deploy. Bars compare kit against kit.
Field identification for everything that comes down the lane. Bars are relative to the whole roster at base strength; campaign depth and mode make all of them tougher.
The wall is the lose condition. You can live. It can't.
Every mode ends when the base wall falls. You strafe left and right along it while your gun autofires up the lane; hold north to pin your fire. In Campaign, survive the mission clock (or kill every boss phase) to win. A clear with the wall at full health counts as a perfect clear and pays a bonus.
Combat Platform research thickens the wall.
The Engineering Droid repairs it on a timer.
Rime Plate and Snow Fort are the cards that protect it directly.
FR
Field Manual
Field Requisition
Choose one. Every fifteen seconds.
When you start a run you get your first card offer. A new offer of three arrives every 15 seconds. If you don't pick within 20 seconds, the leftmost card is taken for you. The first reroll each run is free; after that, rerolls cost scrap, doubling each time.
Core cards add a new weapon to your kit.
Upgrades improve a core you already own, up to three stacks per path.
Survival caps you at six cores, and Challenge Mode has you deploy with exactly six.
TC
Field Manual
Three Card Jobs
A healthy draft covers all three.
Every card does one of three jobs. Wall sanitizers clean up whatever reaches the wall. Elite hunters find the biggest target and delete it. Pure DPS cards grind down the pack in between. Control cards slow, freeze and reposition so the other three have time to work.
Pure DPS: Lawn Darts, Short Circuit, Buzzsaw Roomba, Strings Attached, Void Orb.
O
Field Manual
Ordnance
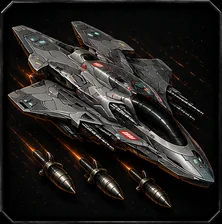
Three buttons outside the draft: ultimate, sortie, consumable.
Your equipped ultimate charges for 90 seconds after the drop and again after each use. Danger Close-Enough, a free jet sortie every operator has, is ready 20 seconds in. Your consumable is ready at the drop and recharges for 90 seconds after each use.
Research and the Engineering Droid can shorten these clocks.
OS
Field Manual
Overdrive & Supply Barrels
Shoot the gold things.
A gold Overdrive beacon surfaces periodically. Break it and one of your core cards deals double damage with no cooldown for 20 seconds. Supply barrels in the lane grant a short random overcharge to one of your gun's stats when shot.
P
Field Manual
Plating
Armor you have to crack before the real damage starts.
Tanks, elites and bosses carry a plating pool. While any plating is left, every hit against them is reduced. Direct Physical hits chip the most plating; other direct hits chip a little; damage over time chips none. At zero the enemy is cracked and takes full damage for the rest of its life.
Tanks carry 15 plating, elites 30, bosses 45.
Hole Punch and Can Opener crack plating fastest.
Physical research (Armor Break) chips even harder.
Field Manual
Elements
Five damage types. Each brings its own status effect, its own research tree and its own ultimate.
P
Physical
Physical
Military brutality. Ballistics. Armor destruction. Bleed. Stagger.
The gun, the shrapnel and the dogs. Physical is the best element against plating and is never resisted by a Hive strain.
Status: Bleed (research) turns hits into damage over time.
Status: Stagger (research) briefly interrupts.
Cracks plating faster than any other element.
Ultimate: Cluster Bomb Barrage.
F
Fire
Fire
Burning. Fear. Spread. Escalation.
Fire cards apply Burn, a steady damage over time. Research lets Burn stack, makes burning enemies panic, and spreads fire from the dead to the living.
Status: Burn. Bosses can hold more stacks than anything else.
Resisted by Ember strains; Azure strains are weak to it.
Ultimate: Thermite Curtain.
L
Lightning
Lightning
Shock. Disruption. EMP. Chains.
Lightning jumps between targets and disrupts enemy attacks. Research adds extra chains, a stun, and Storm Relay, which turns struck enemies into free conductors.
Status: Disruption slows enemy attack speed.
Resisted by Volt strains; Dark strains are weak to it.
Ultimate: Tesla Storm.
F
Frost
Frost
Control. Freeze. Shatter. Tempo manipulation.
Every Ice hit slows. Build enough freeze and the target locks solid. Frozen enemies are easier to crit, and research makes them shatter into shards when they break.
Status: Slow, then Freeze. Bosses ignore the slow.
Resisted by Azure strains; Ember strains are weak to it.
Plasma unlocks after Campaign 2. It tears through mech shields and leaves enemies exposed to extra damage. Research lets plasma hits trigger Fire, Lightning and Frost effects too.
Status: Exposure increases damage taken.
Mech shields take triple damage from Plasma.
Resisted by Dark strains; Volt strains are weak to it.
Ultimate: Orbital Laser.
Field Manual
Hive Strains
Color tells you what an enemy shrugs off and what it can't stand.
E
Ember
Ember
Red. Resists Fire, weak to Frost.
Thermophile strains. Red, crimson and desert-camo enemies shrug off fire and seize up in the cold.
intel brief: the red ones don't mind the fire. recommend ice.
Takes 30% less Fire damage.
Takes 25% more Frost damage.
A
Azure
Azure
Blue. Resists Frost, weak to Fire.
Cryo-adapted strains. Blue, frost and winter-camo enemies resist ice and burn fast.
intel brief: frost-adapted. your freezer is now a suggestion.
Takes 30% less Frost damage.
Takes 25% more Fire damage.
V
Volt
Volt
Yellow. Resists Lightning, weak to Plasma.
Charge-saturated strains ground lightning and dissolve under plasma.
intel brief: grounded footwear is not covered by the plan.
Takes 30% less Lightning damage.
Takes 25% more Plasma damage.
D
Dark
Dark
Black. Resists Plasma, weak to Lightning.
Melanistic and commando-coated enemies shed plasma and conduct lightning straight to the nerves.
intel brief: plasma-hardened. something taught them that.
Takes 30% less Plasma damage.
Takes 25% more Lightning damage.
P
Pale
Pale
Bleached. Status effects land at half strength.
Pale strains have no elemental resistance, but slows, burns, freezes, disruption, fear and shred all land at half strength or duration. Win with raw damage.
intel brief: hard to stun, hard to shock. bullets still work.
Status effects at 50% strength.
Damage is unaffected.
Field Manual
Threat Systems
The things that make a wave worse than the sum of its enemies.
TH
Field Manual
The Hive Director
The waves are not random. Something is calling plays.
During a mission, the Hive runs scripted plays announced by a banner: an armored column, a screen of status-hardened strains, a flank, a Broodcaller. In endless modes, the dominant strain shifts every few minutes. Read the banner, then adjust your draft.
ARMORED COLUMN ADVANCING: the meat is behind the metal.
HARDENED SCREEN DETECTED: status weapons degraded. recommend bullets.
FLANK ACTIVITY: it's a distraction. it knows you know.
AC
Field Manual
Aura Captains
Kill the caller before the answer arrives.
Some elites are promoted to Broodcallers (Hive) or Foremen (machines). Each projects one aura over nearby allies: Haste, Ward, Stealth or Soak. Bosses never receive auras, and the aura dies with the captain.
Ward blocks burns, slows, freezes and phasing inside it.
Stealth stops target locks, not splash.
Soak spreads damage across the pack.
MS
Field Manual
Mech Shields
Every machine arrives behind a plasma shield.
From Campaign 2, mechs carry a shield worth half their health. It soaks a portion of all damage until it breaks, and the hit that breaks it doesn't carry through. Plasma deals triple damage to shields.
Break the shield with Plasma, then crack plating with Physical.
Boss and elite mechs eject a pilot when destroyed.
S
Field Manual
Sappers
Vests and Sentinels arm at mid-lane, then sprint.
A sapper that reaches the wall always detonates at full strength. Kill it early, or kill it once it's armed and inside its own pack so the blast hits them instead.
Field Manual
Glossary
Words you will hear on the radio.
S
Field Manual
SIG
Strategic Infrastructure Group. Your employer.
Buck's private contractor. Oil fields, pipelines, refineries, power. Not a military replacement, whatever the brochure implies.
E
Field Manual
ERA
Energy Resource Administration.
The federal energy body that owns Project Black Gold and hired SIG. Blank-check oversight.
TB
Field Manual
The Breach
The hole Project Black Gold punched in the Permian.
An experiment in New Mexico was supposed to make oil. It opened an aperture to another world instead. What came through was not oil.
K9
Field Manual
Khepri-9
The world on the far side of the Breach.
Home of the Hive. SIG leased it in 48 hours.
K
Field Manual
Kheprium
A naturally occurring crystalline plasma lattice.
The machines are very interested in it. So, now, is everyone with a balance sheet.
SD
Field Manual
Scrap & Data
What the war pays in.
Scrap comes from kills and missions and buys most research. Data is rarer: bosses always drop it, missions pay it, and the big research nodes require it. Buck Bucks are spent in Buck's Procurement.
Arsenal
Field Cards
Drafted mid-run, one offer of three every 15 seconds. Up to six cores, three upgrades per path.
Plating breaker · Physical
Can Opener
Lob a can of Sharp into a clump: a hard blast that cracks plating, then a ring of shrapnel.
Every few seconds Can Opener lands in the thickest part of the pack. The blast strips a large chunk of plating at once, and the shrapnel ring inherits your gun's crit, pierce, ricochet and execute upgrades.
Strengths
Cracks Tank and Elite plating for the rest of your kit
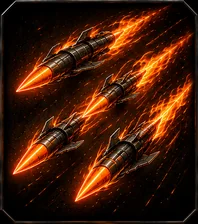
A rail shot that skewers the biggest thing in the lane and everything lined up behind it.
Hole Punch prioritizes elites, tanks and bosses, punches through six targets, and shreds plating on every one. It is the only card that benefits from the Weapon Systems Ballistic Payload upgrade.
A dropship delivers a pack of attack dogs that leap on targets and maul them.
Five Ravagers hunt down the lane, pouncing with a small splash and then mauling for sustained damage. Bites use your gun's crit, pierce, ricochet and execute upgrades.
Strengths
Near-constant uptime
Chases targets down the lane
Weaknesses
Can't reach Fliers
Upgrades
More Ravagers
+1 Ravager per stack.
Sharper Fangs
+50% maul damage and a harder leap per stack.
Unlock
Available from the start
Cycle
20s, active 18s
Pack
5 Ravagers
Field rating
Single target
Crowd
Control
Wall defense
Pure DPS · Physical
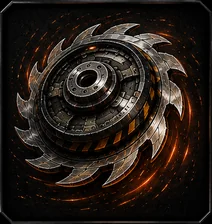
Buzzsaw Roomba
A spinning saw drone that roams the lane grinding through anything it touches.
Buzzsaws patrol the field, ticking damage into everything in contact. Physical hits mean they pair well with Bleed research.
Strengths
Constant grinding pressure on packs
Many small hits stack Bleed fast
Weaknesses
Can't reach Fliers
Low burst
Upgrades
Teeth Out
About +50% saw damage per stack.
More Buzzsaws
+1 saw per stack.
Unlock
Available from the start
Cycle
18s, lasts 12s
Saws
1, up to 4
Field rating
Single target
Crowd
Control
Wall defense
Pure DPS · Lightning
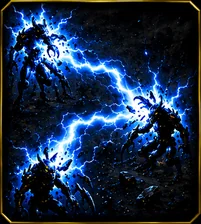
Short Circuit
A free lightning pulse that chains through six targets.
Short Circuit fires on its own every few seconds and hops from target to target. It is the cheapest answer to clumps, Fliers and Vests in one card.
A crackling band in front of the wall that welds whatever crosses it.
Arc Thrower cycles on and off, pulsing lightning into several targets near the wall and forking to their neighbors. Rising Current builds an overload ramp the longer it keeps hitting.
Strengths
Cleans up anything that reaches the wall
Spreads Storm Relay conductors
Weaknesses
Short reach: ranged enemies park outside it
Upgrades
Fork Flood
+1 fork per stack.
Rising Current
Damage ramps with consecutive hits; each stack raises the ramp.
A lightning pillar that locks onto the biggest target and pours current into it.
Capacitor Spike locks bosses first, then elites, then tanks, and ticks heavy damage with a bonus against big targets. When it overloads, it pops in a small blast with a brief stun.
A heavy charge dropped on elites and bosses, with a tight splash.
Daisy Cutter seeks the toughest target in range and hits it with one of the largest single blows a card can deal. It scales with your gun's damage. It counts as Lightning, not Physical.
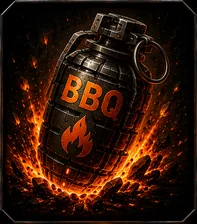
A fire grenade that leaves a burning puddle in the lane.
The impact sets a fire patch that keeps applying Burn to anything walking through it for several seconds.
Strengths
Punishes packs and parked shooters
Weaknesses
Fliers pass over it
Ember strains resist it
Upgrades
Wider Scorch
+30% puddle radius per stack.
White Heat
Hotter burn per stack.
Unlock
Available from the start
Cycle
9s
Puddle
7s
Field rating
Single target
Crowd
Control
Wall defense
Wall sanitizer · Fire
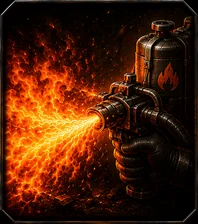
Yard Torch
Four wall nozzles hose a cone of fire across the front of the wall.
Yard Torch cycles on and off, ticking fire damage and Burn into everything in its cone. It is built to clean up whatever survives to the wall.
Strengths
The strongest close-in wall defense
Weaknesses
Ranged enemies park outside it
Ember strains resist it
Upgrades
Bigger Torch
+15% flame size per stack.
Hotter Torch
+30% tick damage per stack.
Unlock
Available from the start
Cycle
Bursts with downtime between
Cone
Wide, in front of the wall
Field rating
Single target
Crowd
Control
Wall defense
Pure DPS · Fire
Lawn Darts
Lobs a salvo of incendiary bolts that seed burns across the field.
Ten bolts scatter over the lane at once, each dealing impact damage and applying Burn. No pierce: every bolt is its own hit.
Strengths
Burns across the whole field at once
Weaknesses
Ember strains resist it
Upgrades
Extra Darts
+2 bolts per stack.
Volatile Payloads
Burning enemies ignite their neighbors on death.
Unlock
Available from the start
Cycle
10s
Salvo
10 bolts
Field rating
Single target
Crowd
Control
Wall defense
Area denial · Fire
Willy Pete
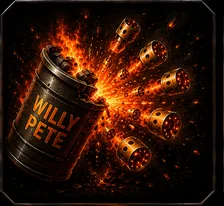
A canister that bursts into bouncing incendiary bomblets.
The canister hits, then splits into bomblets that hop through the pack, burning everything they land near.
Strengths
Spreads burns deep into a pack
Weaknesses
Ember strains resist it
Upgrades
Extra Petes
+1 bomblet and +1 bounce per stack.
Meaner Pete
+40% impact and +33% bomblet damage per stack.
Unlock
Clear Campaign 1, Mission 20
Cycle
8s
Bomblets
3, two bounces each
Field rating
Single target
Crowd
Control
Wall defense
Control · Frost
Brain Freeze
A cryo beam that slows, builds freeze, then locks targets solid.
Brain Freeze sweeps a long beam, slowing and charging its targets until they freeze. Against enemies immune to movement control, like bosses, it deals five times damage instead.
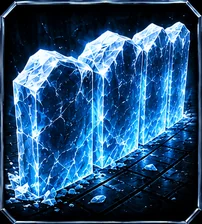
Lob a cryo canister that plants a mid-lane ice wall. Things that chew it get slapped and can freeze.
Snow Fort raises a temporary wall with twice the Base Wall's health in the middle of the lane. Anything that attacks it takes Ice damage, gets snared and builds freeze. Your shots pass straight through, and it absorbs enemy fire aimed past it.
Frost armor for the wall: less damage taken, and attackers pay for every hit.
Rime Plate cuts the damage the wall takes and wraps it in a frost skirt that snares attackers. When it pulses, the reduction deepens and anything hitting the wall takes Ice damage and builds freeze.
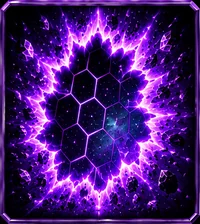
Tears in space that throw enemies back up the lane and leave them phase-sick.
Enemies touching a tear are teleported back up the lane and take damage over time from phase sickness. Each enemy can only be phased again after a short cooldown.
Strengths
Literally un-walks the lane
Weaknesses
Blocked inside a Broodcaller's Ward
Upgrades
Extended Breach Duration
+1.5s tear duration per stack.
Phase Instability
Enemies can be phased again sooner.
Unlock
Clear Campaign 2
Cycle
16s
Tears
Up to 2
Field rating
Single target
Crowd
Control
Wall defense
Pure DPS · Plasma
Strings Attached
Webs a group together so damage to one is shared, and a death bursts across the rest.
Strings Attached webs several enemies. Hits on the primary spill over to the others, webbed enemies take extra damage and plasma burn, and when one dies a share of its max HP bursts through the web.
One equipped at a time. Earned at the end of an element's research tree. Shared 90-second clock.
Ultimate · Physical
Cluster Bomb Barrage
A carpet-bombing flyover across three lane bands, with an encore pass.
Bombers saturate the lane in three bands, then return about ten seconds later. Bombs deal heavy bonus damage to bosses.
Strengths
Whole-lane clear plus boss damage
Weaknesses
Long cooldown: time it for a surge
Unlock
Research: Physical tree
Cooldown
90s
Passes
2
Vs bosses
Massive bonus
Field rating
Single target
Crowd
Control
Wall defense
Ultimate · Lightning
Tesla Storm
Four volleys of storm strikes with a built-in Storm Relay.
Tesla Storm calls repeated volleys of lightning across the field, each strike chaining and relaying between conductive targets.
Strengths
Long, sustained coverage
Weaknesses
Volt strains resist it
Unlock
Research: Lightning tree
Cooldown
90s
Volleys
4, ten seconds apart
Vs bosses
Large bonus
Field rating
Single target
Crowd
Control
Wall defense
Ultimate · Fire
Thermite Curtain
A VTOL strafes the lane and lays burning thermite seams behind it.
Piercing gunfire from the VTOL tears through the pack, and the thermite seams keep burning for well over ten seconds.
Strengths
Area denial that outlasts the strike
Weaknesses
Ember strains resist it
Fliers skip the seams
Unlock
Research: Fire tree
Cooldown
90s
Seams
Long-lasting burn zones
Field rating
Single target
Crowd
Control
Wall defense
Ultimate · Frost
Absolute Zero
A canister drop that flash-freezes a huge field, then shatters what it froze.
Absolute Zero pulses a wide freeze field for twelve seconds. Enemies slow to a crawl, freeze, and shatter for damage to everything around them. Elites and bosses stay frozen for less time.
Strengths
Freezes an entire surge
Weaknesses
Low direct damage
Azure and Pale strains blunt it
Unlock
Research: Frost tree
Cooldown
90s
Field
12s, very wide
Field rating
Single target
Crowd
Control
Wall defense
Ultimate · Plasma
Orbital Laser
An orbital beam lands near the wall and crawls up the lane, pulling enemies into it.
The Orbital Laser burns a path up the lane for twelve seconds, dragging enemies toward the beam. It deals enormous bonus damage to bosses and tears through mech shields.
Strengths
Boss killer
Strips mech shields
Weaknesses
Dark strains resist it
Unlock
Research: Plasma tree (Campaign 2 cleared)
Cooldown
90s
Duration
12s
Vs bosses
Massive bonus
Field rating
Single target
Crowd
Control
Wall defense
Arsenal
Sidearm & Sortie
What every operator brings, every run.
MG
Autofire · Physical
Main Gun
Your autofiring sidearm. Everything else scales off it.
The gun fires automatically as you strafe. Hold north to pin fire up the lane. Many cards, every ultimate and your drones scale with its damage, so Weapon Systems research pays off across the whole kit. Shooting a supply barrel grants a short random overcharge.
A free jet sortie that drops a string of bombs across the whole lane.
Every operator gets this one, no research required. It is ready early in the mission and hits every enemy in the lane once.
Strengths
Free, early panic button
Weaknesses
Light damage
Unlock
Every account
Ready
20s into the mission
Field rating
Single target
Crowd
Control
Wall defense
Arsenal
Drones
One escort drone per loadout, built and upgraded in the Drone Hangar.
Sustained DPS · Physical
Machine Gun Drone
General-purpose sustained DPS support platform.
Reliable, long-range fire at a steady rate. The default drone once you build the Hangar.
Strengths
Consistent damage
Weaknesses
No splash
Unlock
Drone Hangar (default platform)
Fire rate
3 shots/s
Field rating
Single target
Crowd
Control
Wall defense
Priority target eliminator · Fire
Laser Drone
Precision beam platform that excels at priority target elimination.
The beam ramps up the longer it stays on one target, reaching three times its starting damage. Mastery can convert it to Plasma.
Strengths
Melts elites and bosses
Weaknesses
One target at a time
Ember strains resist it
Unlock
Clear Campaign 1, Mission 15, then build
Damage ramp
Up to 3x
Field rating
Single target
Crowd
Control
Wall defense
Area denial · Physical
Missile Drone
Slow-firing artillery drone tuned for splash pressure and wave clearing.
Each missile hits hard and splashes several enemies around the impact, falling off toward the edge.
Strengths
Wave clearing
Weaknesses
Slow fire rate
Unlock
Clear Campaign 1, Mission 15, then build
Splash
Up to 6 enemies
Field rating
Single target
Crowd
Control
Wall defense
Arsenal
Consumables
One type per loadout. Ready at the drop, then on a 90-second cooldown.
Repair
Patch Kit
50% of the wall over 10 seconds. Stops at full.
Unlock
Buck's Procurement
Cooldown
90s
Gun boost
Overclock
Gun fire rate +100% for 8 seconds.
Unlock
Buck's Procurement
Cooldown
90s
Drone boost
Wingman
Two copies of your drone for 12 seconds.
Unlock
Buck's Procurement
Cooldown
90s
Cooldown reset
Reset
Core cards that are cooling snap to ready.
Unlock
Buck's Procurement
Cooldown
90s
Wall immunity · Plasma
Overcharge
6 seconds. The wall takes nothing. Hits bounce back.
Unlock
Buck's Procurement (Plasma unlocked)
Cooldown
90s
Arsenal
Base Defenses
The wall and the people keeping it standing.
BW
Lose condition
Base Wall
The wall is the lose condition. You can live. It can't.
Every mode ends when the wall falls. Combat Platform research thickens it with more HP, flat armor, and resistance to heavy hits. After Campaign 2, a regenerating plasma shield can sit in front of it.
A repair bot that patches the wall on a timer and keeps your cards cycling.
The droid restores a slice of wall HP every 15 seconds. Research improves repairs, adds an emergency heal when the wall drops low, and shaves time off your card, ultimate, sortie and consumable cooldowns.
Upgrades
Repair Efficiency
Bigger repairs.
Emergency Recovery Protocol
Large heal when the wall drops below 30%.
Diagnostics
Faster core card cooldowns.
Combat Systems Calibration
Each repair cycle takes 9 seconds off your ultimate, sortie and consumable cooldowns.
Unlock
Clear Campaign 1, Mission 10, then build
Repair
Every 15s
Bestiary
The Hive
Native to Khepri-9. Converts living tissue into more Hive. Not here for the oil.
G
Grunt
Grunt
The bulk of every wave. Individually harmless; collectively, the reason the wall has a repair budget.
Radio call “The meat.”
Grunts walk the lane in clumps and chew on whatever is in front of them. No plating, no tricks. They exist to soak your attention while something worse lines up behind them.
Strengths
Arrive in numbers that bury single-target weapons
Screen tougher units walking behind them
Weaknesses
No plating: every hit lands at full strength
Packed tightly, so splash and chains go far
Field variants
RapaxCommon lane predator. No elemental adaptation.
Frost RapaxCryo-adapted circulation shrugs off cold, but its hide burns fast.
Dark GobblerAblative black carapace sheds plasma; conducts lightning straight to the nerves.
Crimson GobblerThermophile bloodline shrugs off fire, but seizes up in the cold.
Known species Gobbler, Rapax, Bufomorph, Deinodonte, Entomorane, Scolomorph, Telluropod
Sprinters cover the lane at more than twice a Grunt's pace. They die to a stiff breeze, but only if the breeze gets there in time. Anything that slows them turns them back into Grunts.
Strengths
Reach the wall before slow, lobbed weapons land
Punish a draft with no area coverage
Weaknesses
Lowest HP in the Hive
Slows and snares erase their only advantage
Field variants
AngleroxDeep-strain flanker with a bioluminescent lure. No elemental adaptation.
A Sprinter that skips the floor, and everything you put on it.
Radio call “Inconvenient sprinter.”
Fliers ride above the lane, so ground effects never touch them: fire puddles, black ice, frost skirts, Ravagers and Buzzsaws all pass underneath. Bring something that aims.
Strengths
Ignore every floor-based weapon
Sprinter speed
Weaknesses
Sprinter HP: one solid hit
Direct fire and chains still connect
Known species Densoptere, Drackmahre, Marhomorph, Scyver, Vespomorph
A Flier that learned to spit. Hovers short of the wall and shells it.
Radio call “Circles and shoots.”
Buzzards stop a short distance out and fire ichor at the wall on a steady rhythm. Airborne, so floor effects miss; parked, so anything that aims can finish them.
Slow, heavily plated, and built to absorb the damage meant for everything behind it.
Radio call “Plate.”
Tanks carry a plating pool that cuts all incoming damage until it cracks. Physical hits chip plating fastest. Once a Tank is cracked, it takes full damage for the rest of its life.
Strengths
Plating reduces every damage type until cracked
Absorbs fire meant for the pack
Weaknesses
Slowest thing on the field
Physical hits crack plating quickly
Field variants
TankHeavy chitin plating (armor 15). No elemental adaptation.
Dark TankObsidian-plated strain (armor 15); sheds plasma, conducts lightning through the joints.
Volt TankCharge-saturated strain (armor 15); grounds lightning, dissolves under plasma.
Pale TankBleached strain (armor 15); calloused hide takes all status effects at half strength.
ArackArmored burrower (armor 15). No elemental adaptation.
Dark ArackObsidian shell sheds plasma (armor 15); conducts lightning through the joints.
Known species Tank, Arack, Giant Slug, Karcinomorph, Tetrachnide
Tank plating, artillery manners. Parks short of the wall and lobs heavy spit.
Radio call “Sat down and opened up.”
A Porch walks in at Tank pace, settles down, and starts firing hard-hitting shots at the wall. It carries full Tank plating, so crack it before it gets comfortable.
An elite built for speed instead of bulk, with the hardest-hitting claws below boss class.
Radio call “Elite slot, skinny, mean hands.”
Rippers trade some of an elite's mass for Grunt-pace movement and heavy contact damage. Full elite plating. Left alone at the wall, one will take a visible bite out of it.
Strengths
Elite plating at normal speed
Highest non-boss contact damage
Weaknesses
Less HP than other elites
Priority target for elite hunters
Known species Arthromahre, Cavecrawler, Hellcreeper, Karckmahre, Skorpmare
Mini-boss class breachers. Thick health bar, thick plating.
Radio call “Thick bar.”
Elites carry heavy plating and enough HP to soak a full card cycle. From Campaign 2 onward, some are promoted to Broodcallers that project an aura over the pack.
Strengths
Plating plus a deep HP pool
May carry a Broodcaller aura
Weaknesses
Slow
Physical hits crack plating quickly
Field variants
UrsacetusMini-boss class breacher (armor 30). No elemental adaptation.
Dark UrsacetusMelanistic breacher strain (armor 30); sheds plasma, conducts lightning.
Volt UrsacetusCharge-saturated breacher strain (armor 30); grounds lightning, dissolves under plasma.
GasterobrachMini-boss class crusher (armor 30). No elemental adaptation.
Walks in quietly, arms at mid-lane, then sprints for the wall and detonates.
Radio call “Vest…”
A Vest moves at Grunt pace until it crosses the middle of the lane. Then it arms and sprints at three times speed, exploding on contact with the wall or anything in its path. A blast that reaches the wall always lands at full strength. Kill an armed Vest inside its own pack and the blast goes off there instead.
Strengths
One of the biggest single hits on the wall
Sprint leaves little time to react once armed
Weaknesses
Dies to almost anything
An armed Vest killed in a crowd damages its own side
Theater apex predators. The heaviest plating in the Hive, and they cannot be pushed around.
Radio call “The lease.”
Bosses ignore slows, roots, stuns and fear. Burns and other damage over time still land, and their burn stacks run deeper than anything else's. Contact damage is doubled. Every boss kill pays guaranteed Data. From Campaign 2, alien bosses arrive with four times the health.
Strengths
Largest HP pool in the game
Movement control does nothing
Double contact damage
Weaknesses
Slow
Burns and DoT still land, with a higher stack cap
Several ultimates deal bonus damage to bosses
Field variants
Hive TyrantTheater apex (armor 45). Shrugs off slows, stuns and fear.
King SpawnBrood apex (armor 45). Shrugs off slows, stuns and fear.
TitanockarceTentacled apex (armor 45). Shrugs off slows, stuns and fear.
IngenalvusDevourer apex (armor 45). Shrugs off slows, stuns and fear.
Known species Hive Tyrant, King Spawn, Titanockarce, Ingenalvus, Clypeosaurus, Letalobrach
Autonomous mining mechs encountered from Campaign 2. Every chassis carries a plasma shield.
CD
Ranged grunt
Combat Droid
The machines' line infantry. Holds well back from the wall and fires.
Combat Droids stop farther out than any Hive shooter and plink at the wall. Like every mech, they carry a plasma shield that soaks hits until it breaks. They also climb out of destroyed boss mechs as pilots and join the fight.
Strengths
Longest firing range in the roster
Shield absorbs the first chunk of damage
Weaknesses
Light chassis once the shield drops
Plasma tears through mech shields
Field variants
Combat Droid (Army)Standard-issue chassis. No elemental hardening.
Combat Droid (Desert)Heat-shielded plating resists fire; brittle in the cold.
Combat Droid (Forest)Field camouflage only. No elemental hardening.
A fast melee chassis. Also the pilot pod that bails out of a dying Light Biped.
Droid OIIs run the lane at Sprinter speed behind a plasma shield. When a Light Biped goes down, its Droid OII pilot ejects and flees for a few seconds. It still pays out if you catch it.
Strengths
Sprinter speed with a shield on top
Weaknesses
Fragile once the shield drops
Slows and plasma both work
Field variants
Droid OII (Army)Standard-issue chassis. No elemental hardening.
An armored walker that parks short of the wall and shells it.
The Aranobot is the machines' answer to the Porch: Tank plating, a plasma shield over that, and heavy ranged shots. Strip the shield with plasma, then crack the plate.
Strengths
Shield, plating and range in one chassis
Weaknesses
Very slow
Plasma breaks the shield, Physical cracks the plate
Field variants
Aranobot (Army)Armored walker (armor 15). No elemental hardening.
Aranobot (Winter)Arctic-hardened walker (armor 15); resists ice, weak to fire.
Aranobot (Desert)Heat-shielded walker (armor 15); resists fire, weak to ice.
Aranobot (Forest)Armored walker (armor 15). Field camouflage only.
The toughest thing short of a boss. Heavy plating, a deep shield, and real firepower.
Light Bipeds carry several times the health of a Hive elite plus a shield worth half again. They fire hard, fast shots from close range. When one falls, its Droid OII pilot ejects and runs. Catch it for the bounty. Can be promoted to a Foreman.
Strengths
Largest non-boss health pool
Shield plus plating
Can carry a Foreman aura
Weaknesses
Slow
Plasma shreds the shield
Field variants
Light Biped (Army)Mini-boss class mech (armor 30). No elemental hardening.
A demolition chassis that does exactly what a Vest does, behind a shield.
The Biped Sentinel walks in, arms at mid-lane, then sprints for the wall and detonates. Its plasma shield buys it extra time on the run, so start shooting early.
Strengths
Wall-cracking blast
Shield survives one more hit than a Vest
Weaknesses
Light chassis under the shield
Kill it early, before it arms
Field variants
Sentinel (Army)Standard-issue demolition chassis. No elemental hardening.
Sentinel (Winter)Arctic-hardened; resists ice, weak to fire.
Sentinel (Desert)Heat-shielded; resists fire, weak to ice.
Sentinel (Forest)Field camouflage only. No elemental hardening.
A boss-class melee mech with full boss plating and a shield on top. Like every boss, it ignores slows, stuns and fear. When it goes down, its Combat Droid pilot climbs out and keeps fighting.
Strengths
Boss HP, plating and shield
Immune to movement control
Weaknesses
Melee only
Plasma for the shield, Physical for the plate
Field variants
Mining MechRepurposed industrial apex (armor 45). Shrugs off slows, stuns and fear.
A walking weapons platform that shells the wall from long range.
The Quadraped holds as far back as a Combat Droid and fires heavy rounds. Boss plating, a plasma shield, immunity to movement control, and a Combat Droid pilot that joins in when the hull dies.
Strengths
Boss toughness at long range
Wall defenses can't reach it
Weaknesses
Parks and stays put
Plasma for the shield, Physical for the plate
Field variants
Quadraped (Army)Walking weapons platform (armor 45). Shrugs off slows, stuns and fear.
Quadraped (Winter)Arctic apex (armor 45); resists ice, weak to fire.
Quadraped (Desert)Heat-shielded apex (armor 45); resists fire, weak to ice.
Quadraped (Forest)Walking weapons platform (armor 45). Field camouflage only.
An elite promoted to field commander. Projects one aura over everything nearby.
Radio call “Kill the caller before the answer arrives.”
Broodcallers (Hive) and Foremen (machines) are elites with extra health and an aura that buffs allies within a short radius. Each carries one aura. A captain cannot buff itself, and bosses never receive auras. The aura ends when the captain dies.
Strengths
Turns an ordinary pack into a problem
Ward shuts down status-based builds
Weaknesses
Everything collapses when the captain dies
Stealth does not stop area damage
Unlock
Campaign 2 (scripted appearances in Campaign 1)
Haste
Allies move faster
Ward
Burns, slows, freezes and phase effects can't land inside